Home > Configuration Portal > Workflow Designer > Create a New Workflow
Create a New Workflow
Follow the steps below to create a new workflow:
-
Navigate to Employee admin > Workflow designer and then click Create.
-
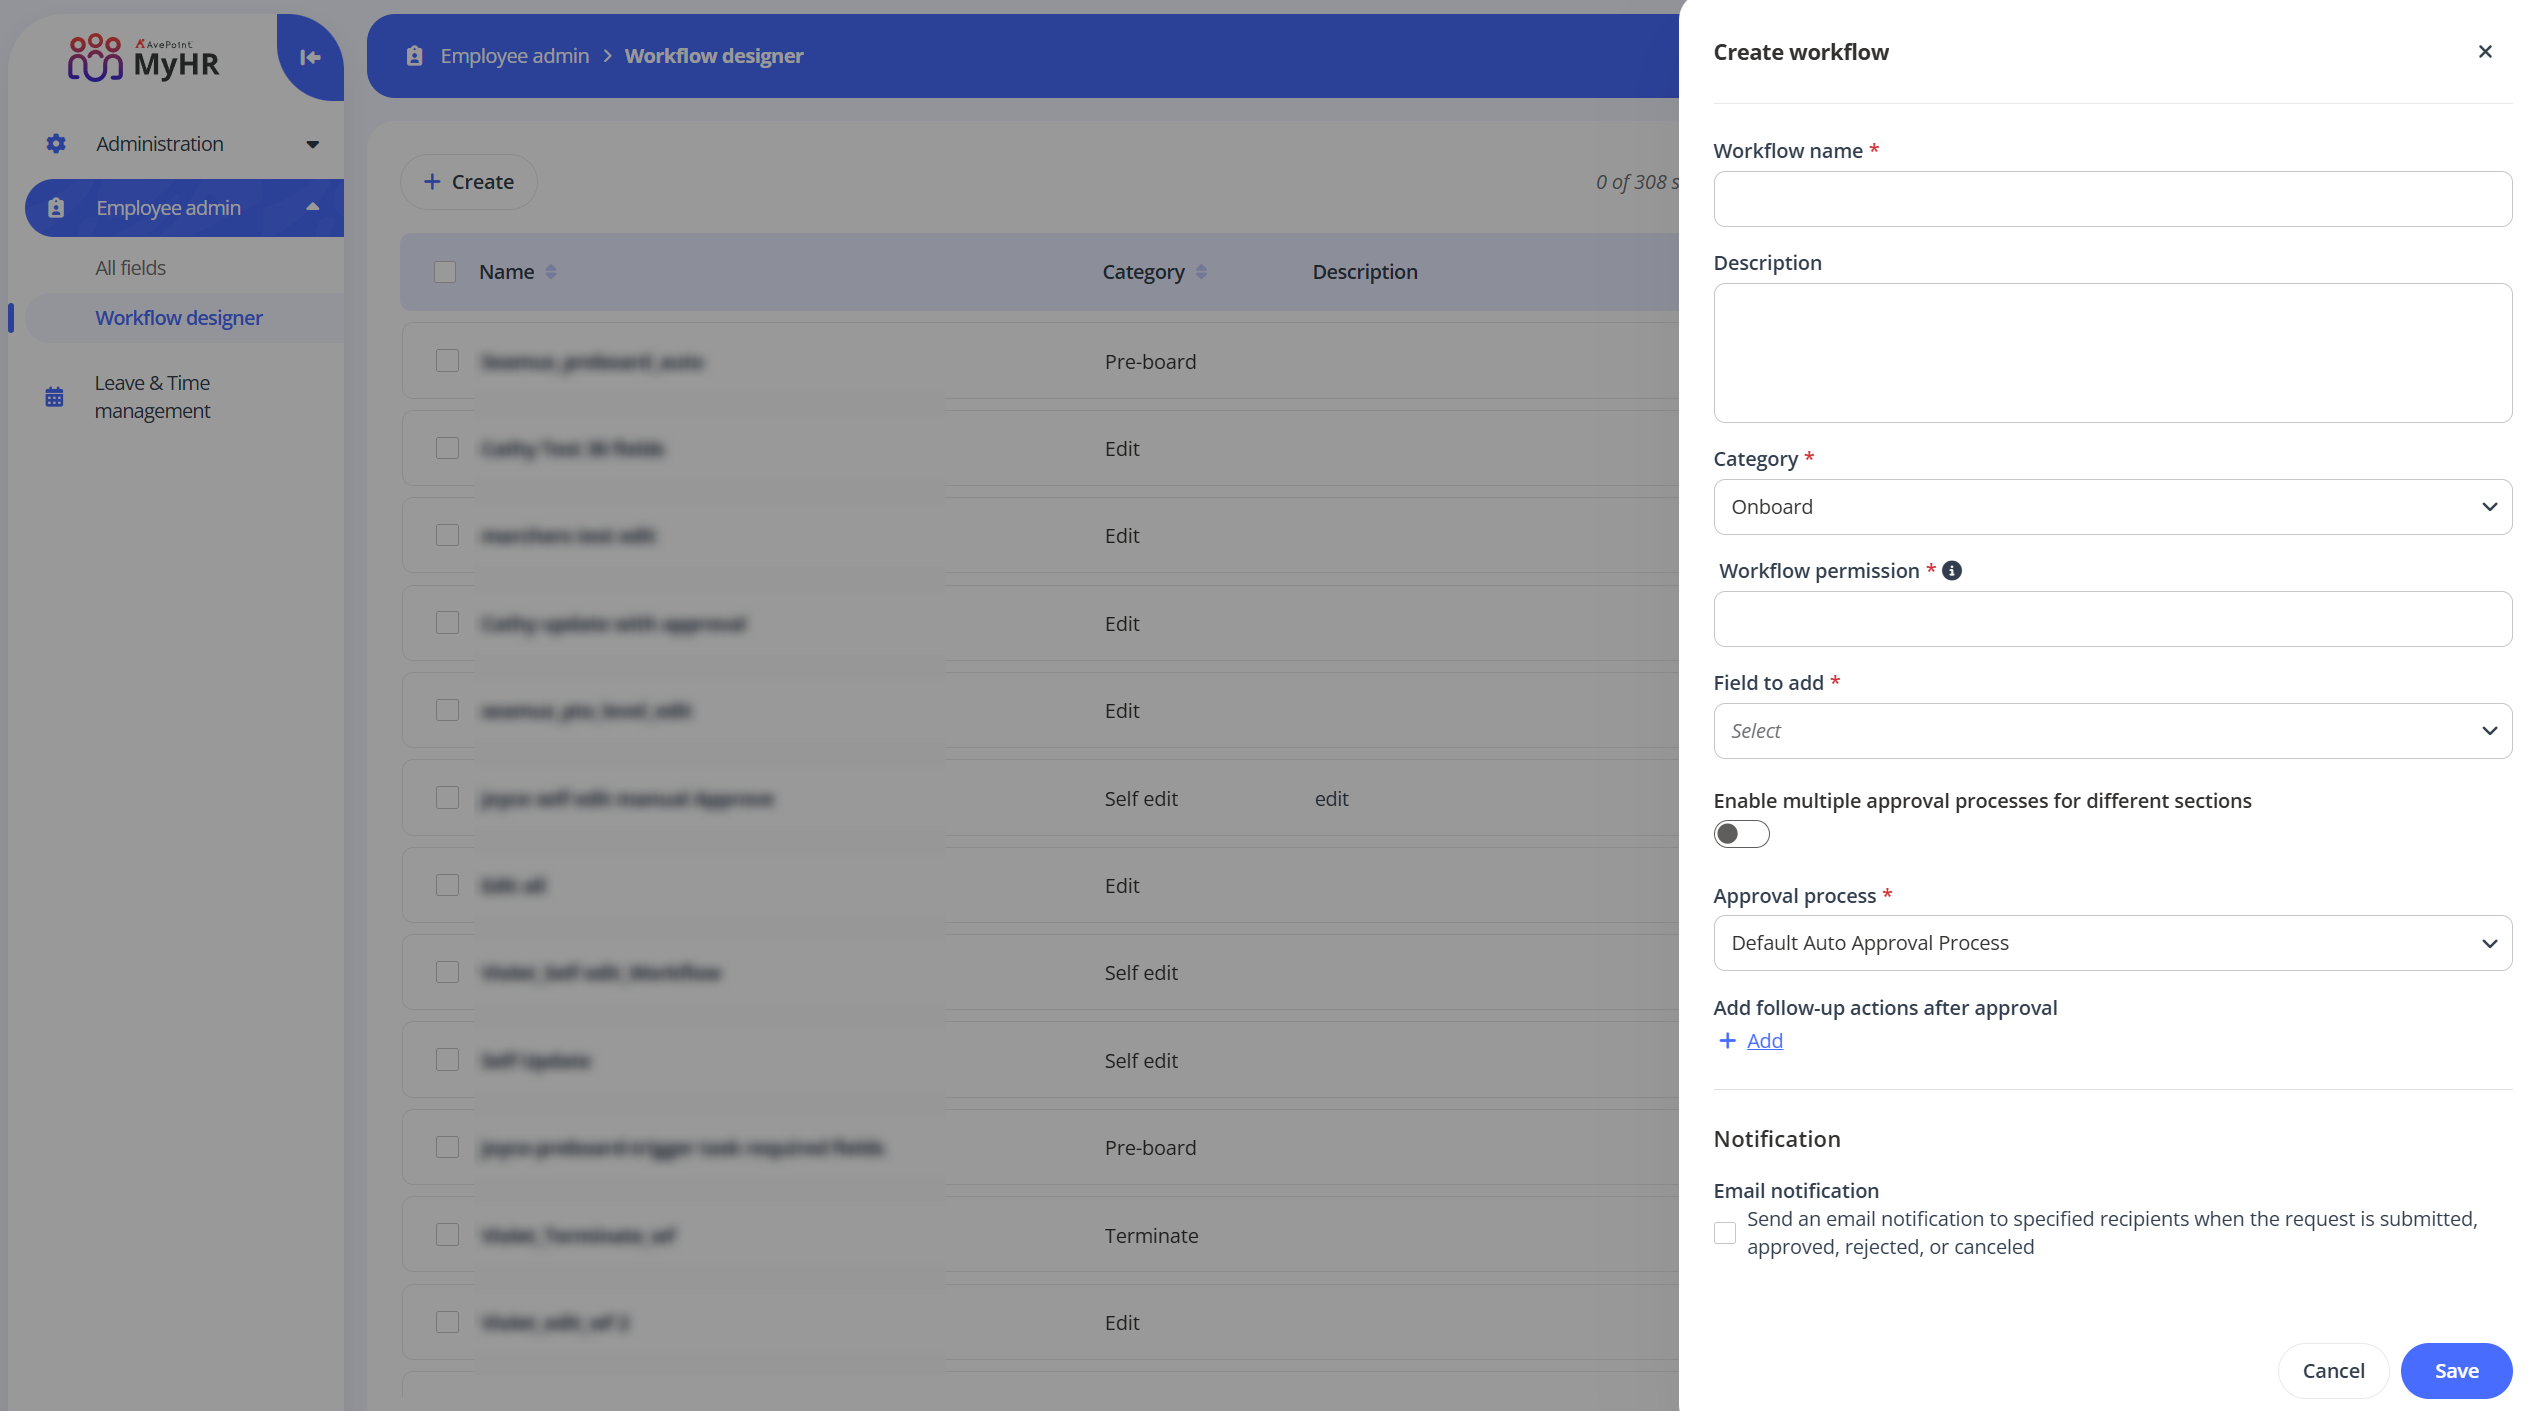
In the Create workflow panel, complete the following settings:
-
Workflow information – Enter a name and description for the workflow you are creating. The description is optional.
-
Category – Select a workflow type from the drop-down list.
-
Workflow permission – Enter a role name. Only users assigned with the role can submit request with this workflow.
-
Field to add – Select fields from the drop-down list. Only the selected fields can be edited when processing a request using the workflow.
-
Approval process settings – Configure the approval process settings for the workflow. For details on how to create an approval process, refer to Create a New Approval Process.
-
If enabling multiple approval processes for different sections, you can select an approval process for each section.
-
If disabling multiple approval processes for different sections, select an approval process for the workflow from the Approval process drop-down list.
-
-
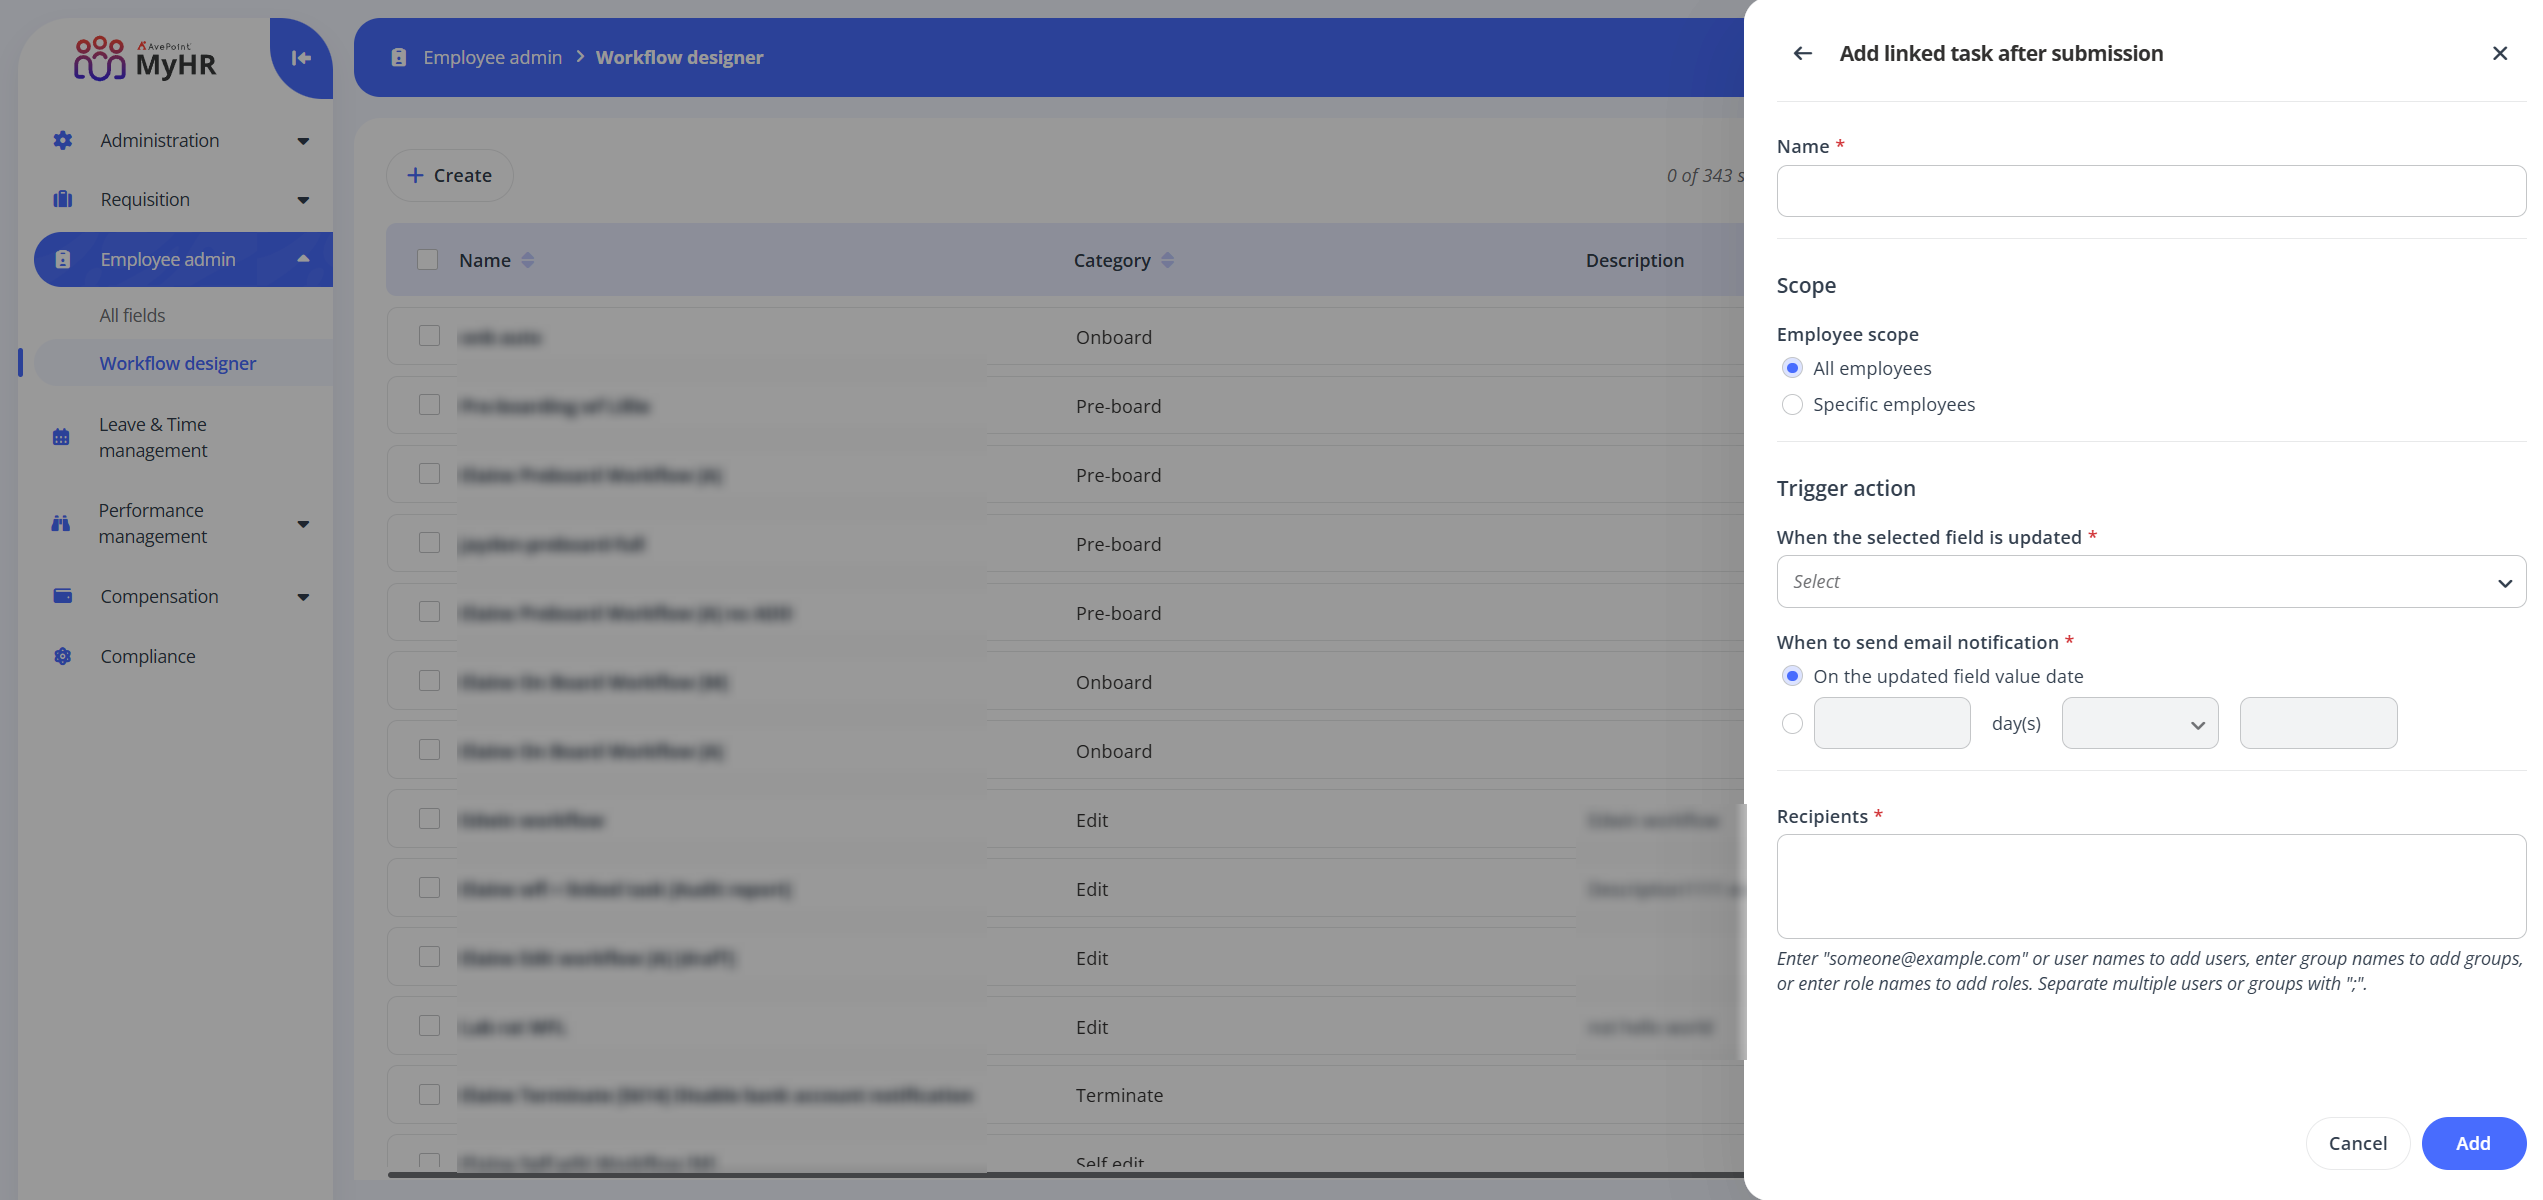
Linked task after submission/Linked task after approval - Click Add to add tasks. In the Add linked task after submission/Linked task after approval panel, complete the following settings:
-
Name – Enter a name for the task.
-
Employee scope – Specify the employee scope.
-
All employees - All employees need to complete the task.
-
Specific employees - Specific employees need to complete the task. You can configure the rule conditions for the employees. Click Add to add multiple rules to filter employees.
-
-
Trigger action – Configure the trigger action of the task.
-
When the selected field is updated - Select a field from the drop-down list.
-
When to send email notification - Choose to send the email notification on the updated field value date, or configure it to send a number of days before or after the updated field value date.
-
-
Recipients - Configure the email recipients of the task notification.
-
-
Notification – By default, the email notification will be sent to approvers when the request is submitted. Select the option to configure the Cc and Bcc recipients for the email notification.
-
-
Click Save to save this workflow.